Recording List
Learn how to manage your recorded live streams by viewing, filtering, and organizing recordings created in the Recorder module.
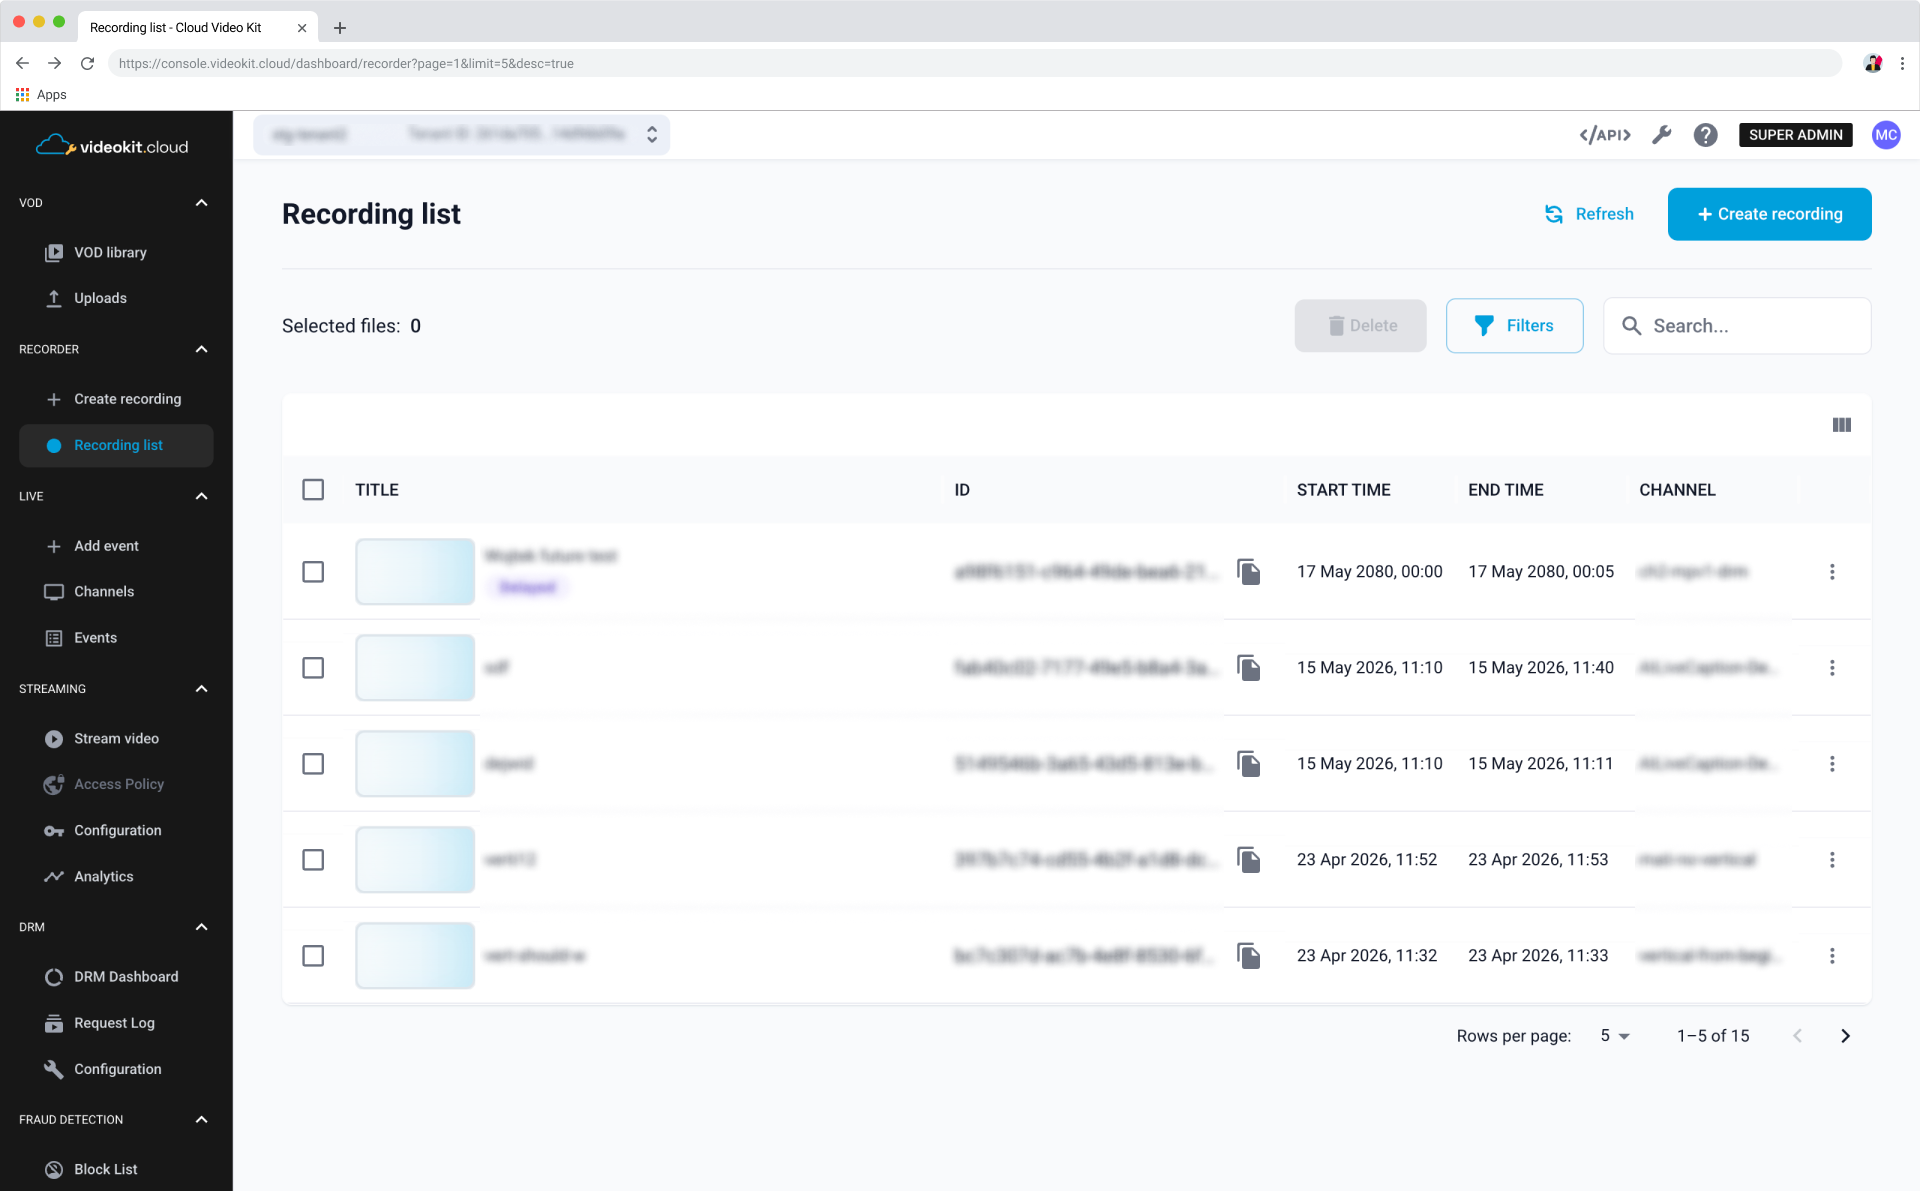
Recording List Page
The Recording List page provides a centralized view of all recordings captured from live channels. It allows you to quickly browse, search, and manage your recorded content.
You can view key information about each recording, including:
- Title
- ID
- Start time
- End time
- Channel
- Status (e.g., Available, Delayed)
Managing Recordings
Each recording in the list can be selected using the checkbox on the left side. Once one or more recordings are selected:
- The Delete button becomes active, allowing bulk deletion of selected recordings.
Each row also includes a context menu (three dots) for additional actions related to a specific recording.
Clicking on a recording title opens its detailed view page for further configuration.
Sorting
You can sort recordings by the available columns to organize your content more efficiently:
- Title
- ID
- Start time
- End time
- Channel
Sorting helps quickly locate recent recordings or recordings from specific channels.
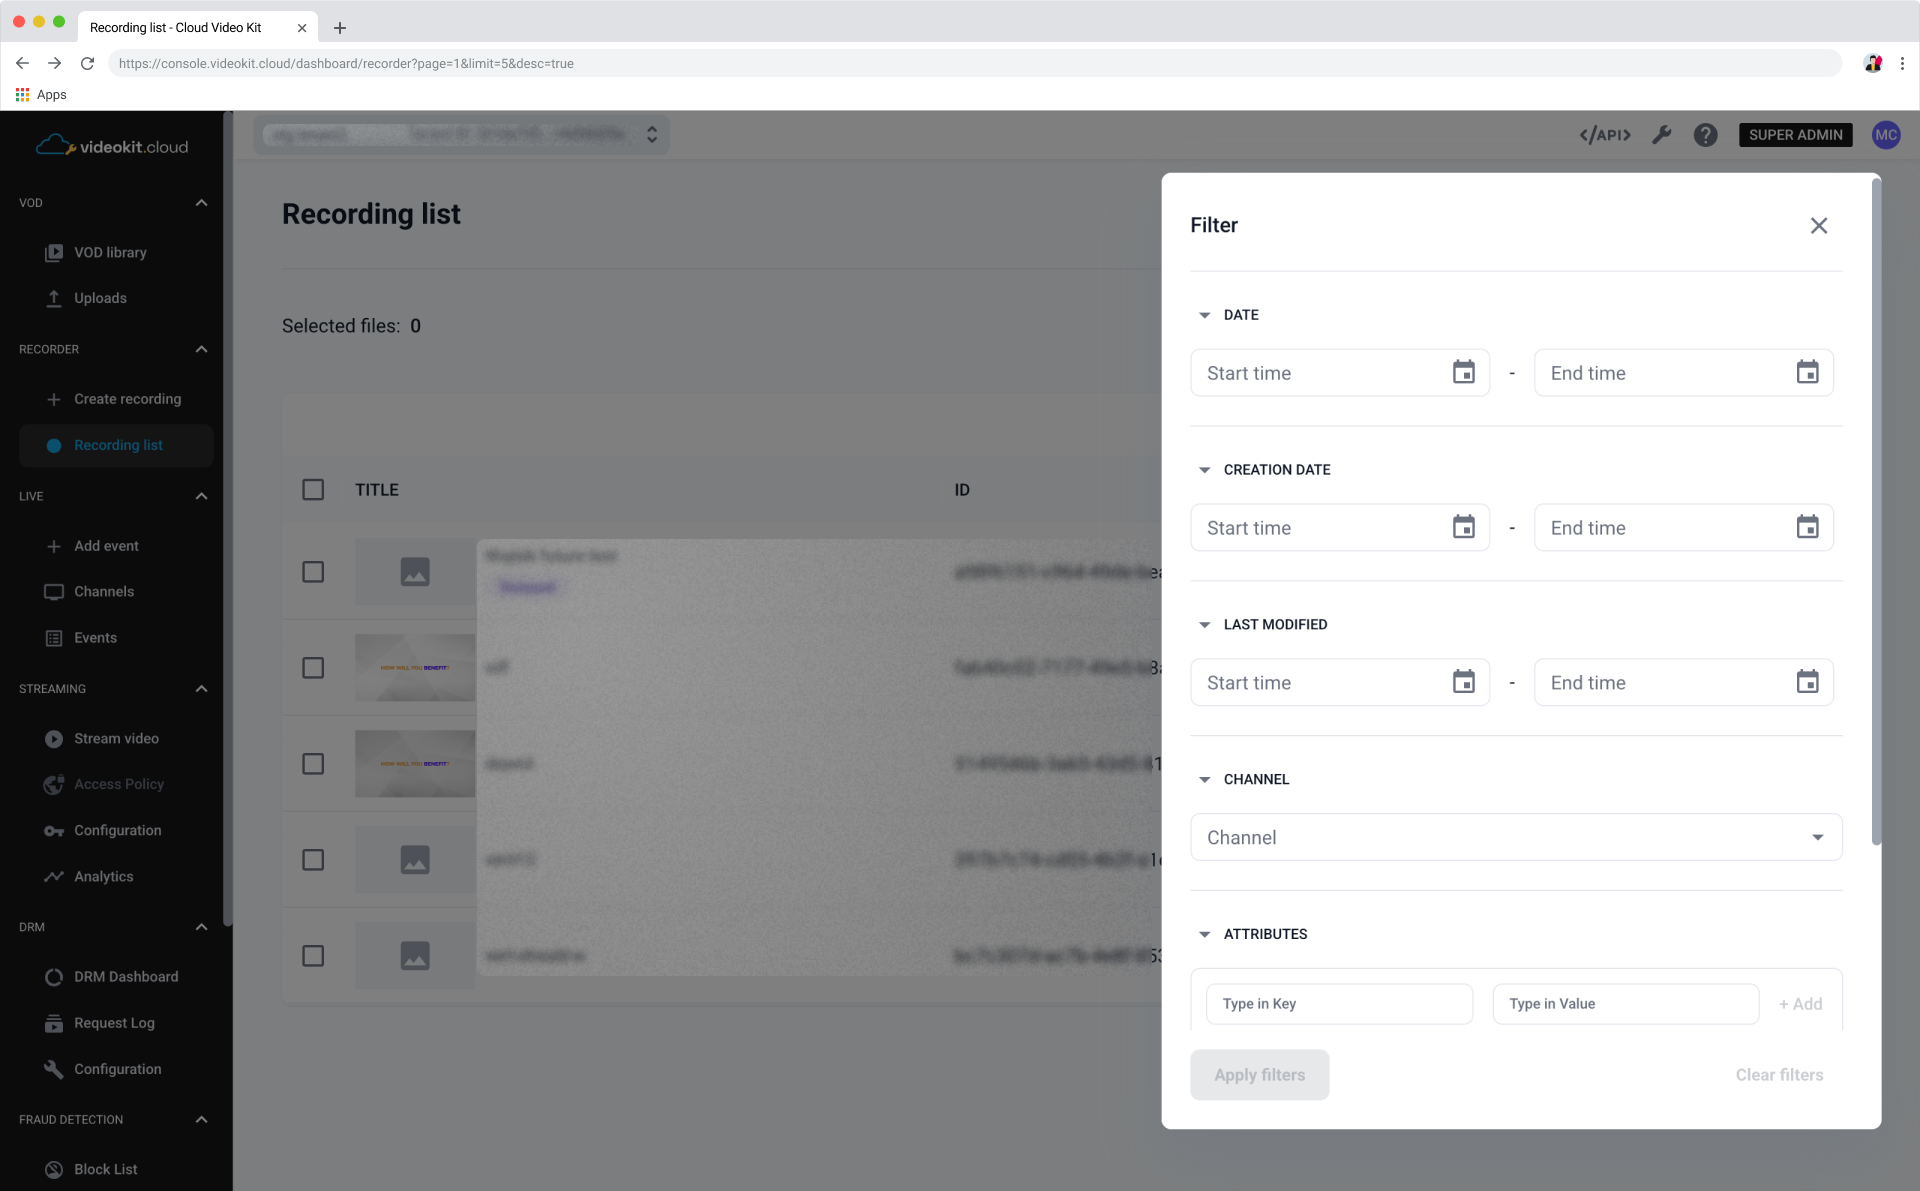
Filtering Recordings
To narrow down the list, use the Filters button to open the filtering options.
You can refine results based on available criteria (such as channel, time range, or status), then click Apply filters to update the list.
Search
Use the Search box to quickly find recordings by title. The list updates dynamically as you type, making it easy to locate specific entries.
Refreshing Data
Click the Refresh button to reload the list and fetch the most up-to-date recording data.
Pagination
If there are multiple recordings, the list is divided into pages:
- Navigate between pages using the pagination controls at the bottom of the table.
- Adjust the number of rows displayed per page using the Rows per page selector.
Recording Details Page
The Recording details page provides a comprehensive view of a selected recording, including playback preview, metadata, and available streaming endpoints.
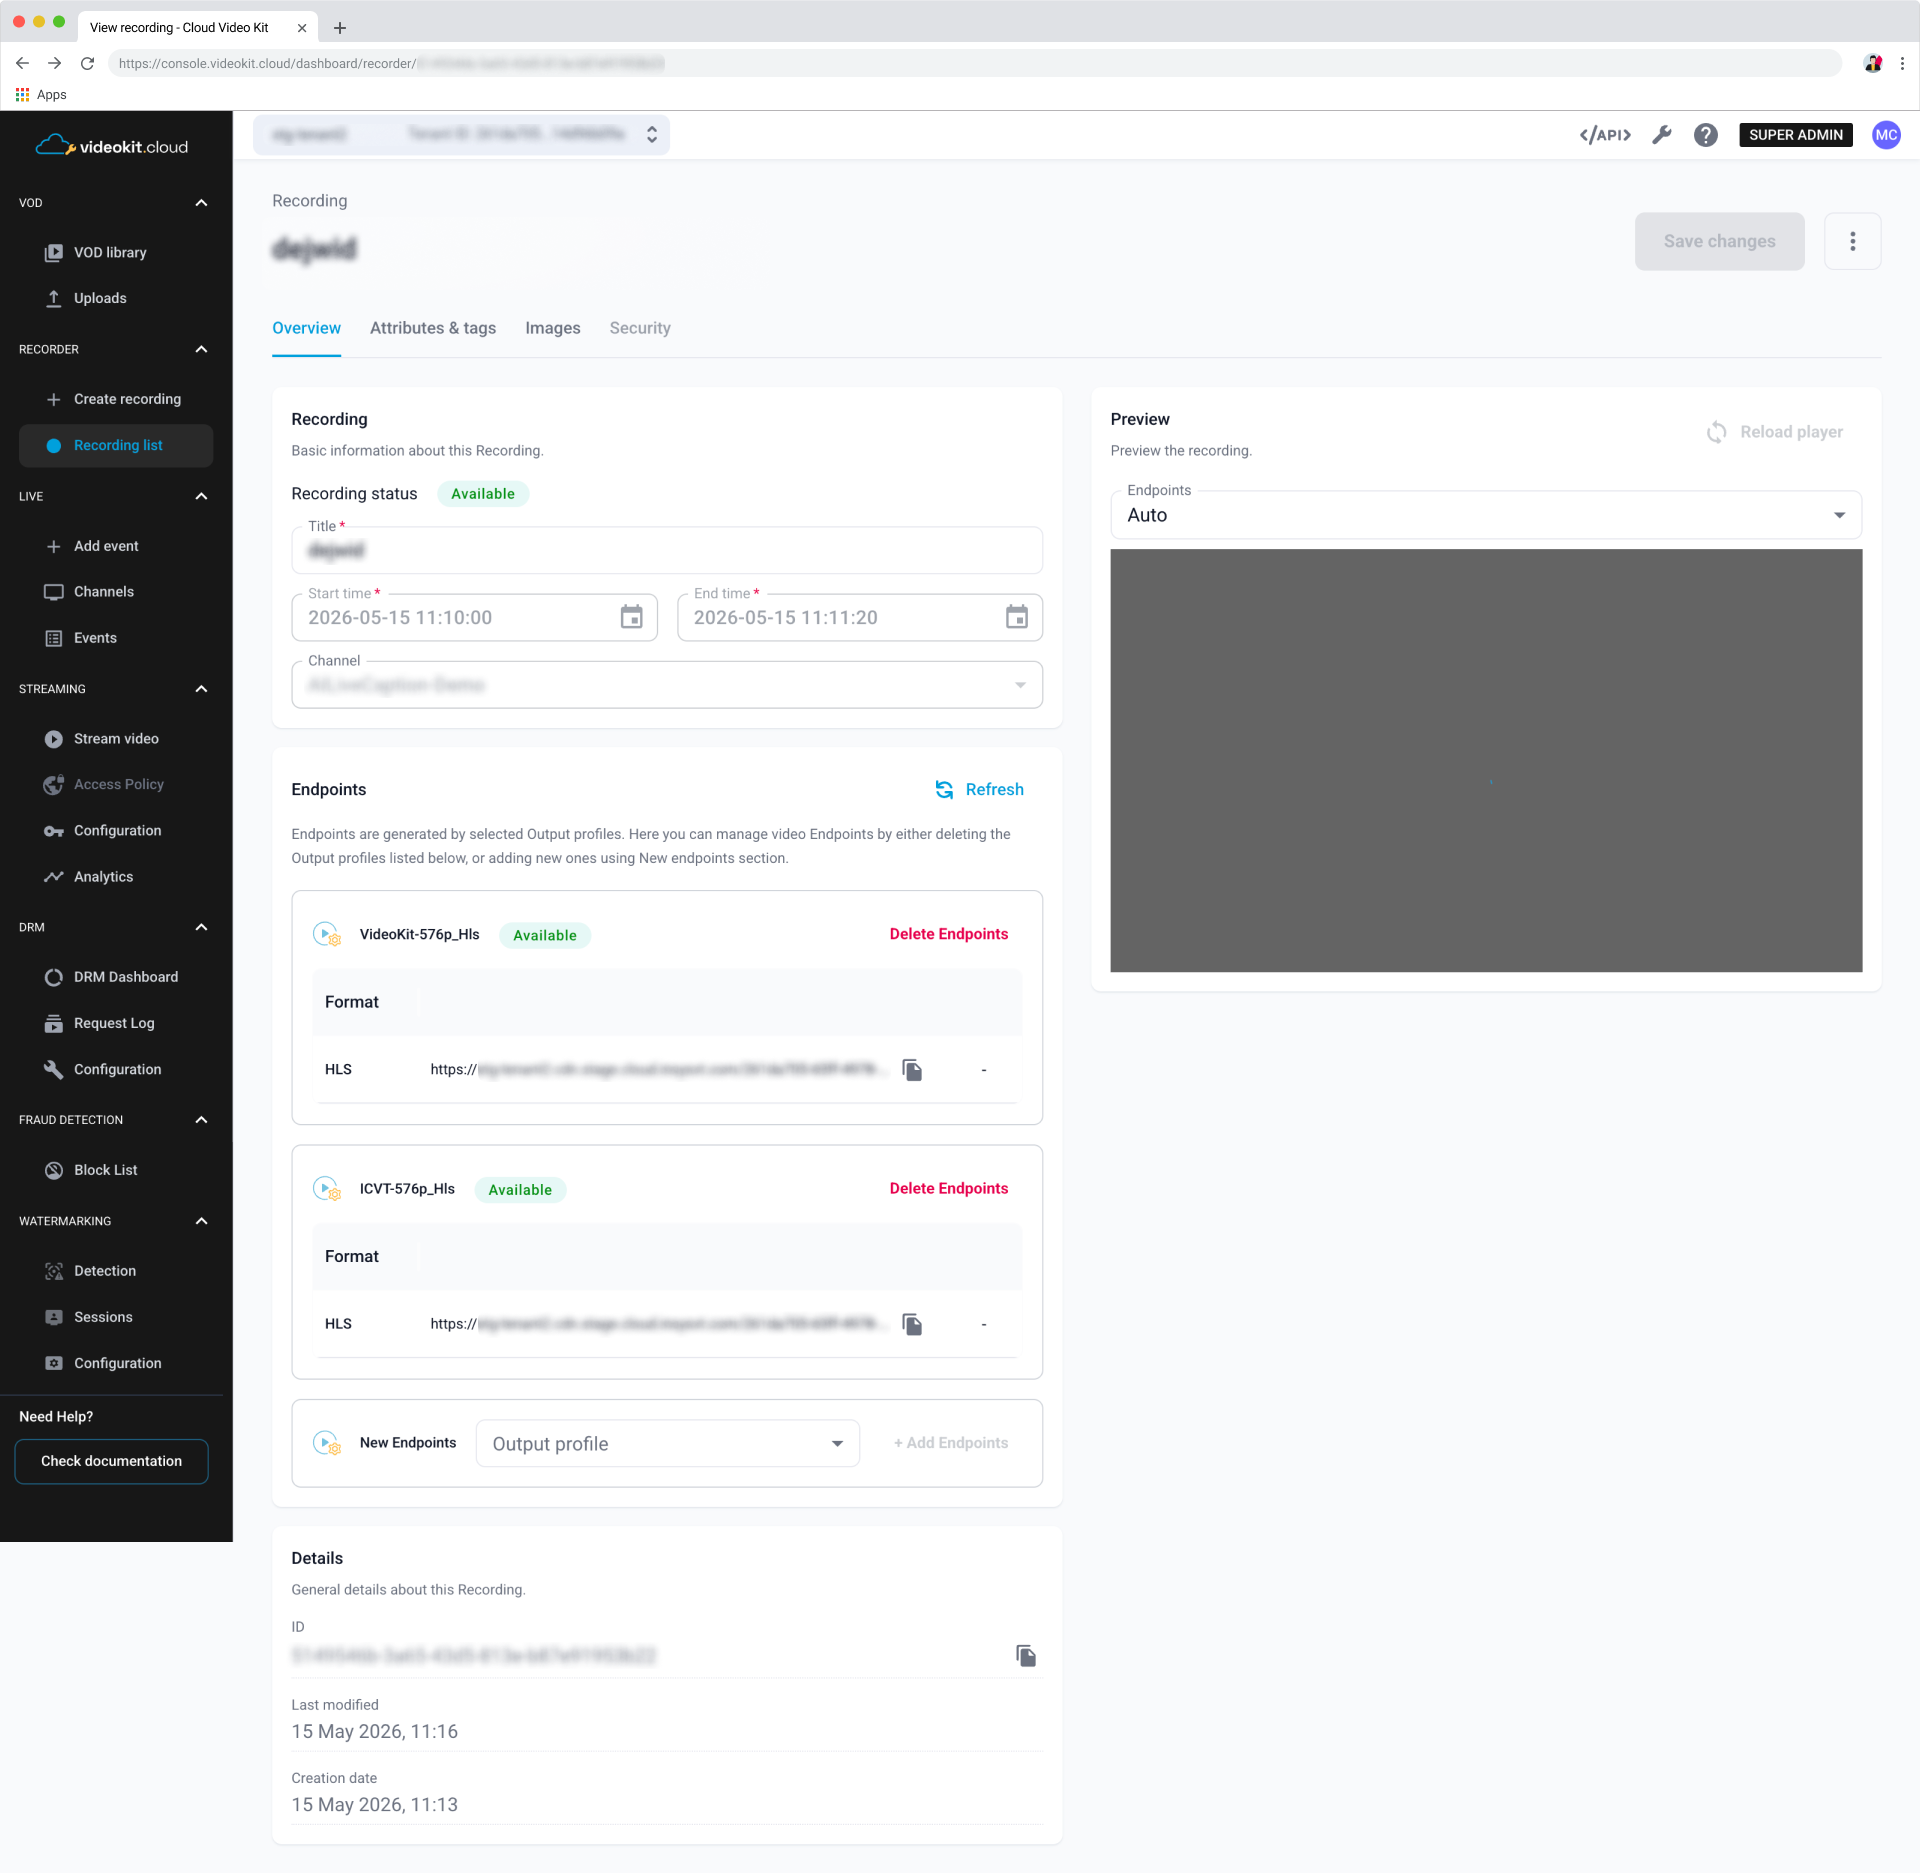
Overview
The Overview tab displays basic information about the recording and allows limited configuration.
Recording Information
This section includes:
- Recording status (e.g., Available)
- Title (editable)
- Start time
- End time
- Channel used for recording
You can modify the recording title and save changes using the Save changes button.
Preview
The Preview panel allows you to play the recording directly in the console.
- Select an endpoint (e.g., Auto) from the dropdown
- Use Reload player if playback does not start automatically
This helps verify recording quality and output configuration.
Endpoints
The Endpoints section lists all streaming outputs generated for the recording based on selected output profiles.
For each endpoint, you can:
- View endpoint name and status
- Copy streaming URL (e.g., HLS manifest)
- Delete endpoints if no longer needed
Adding Endpoints
To generate additional outputs:
- Select an Output profile from the dropdown in the New Endpoints section
- Click + Add Endpoints
Refreshing Endpoints
Use the Refresh button to update endpoint status and availability.
Details
Provides technical metadata about the recording:
- ID (unique identifier)
- Last modified date
- Creation date
This information is useful for tracking and integration purposes.
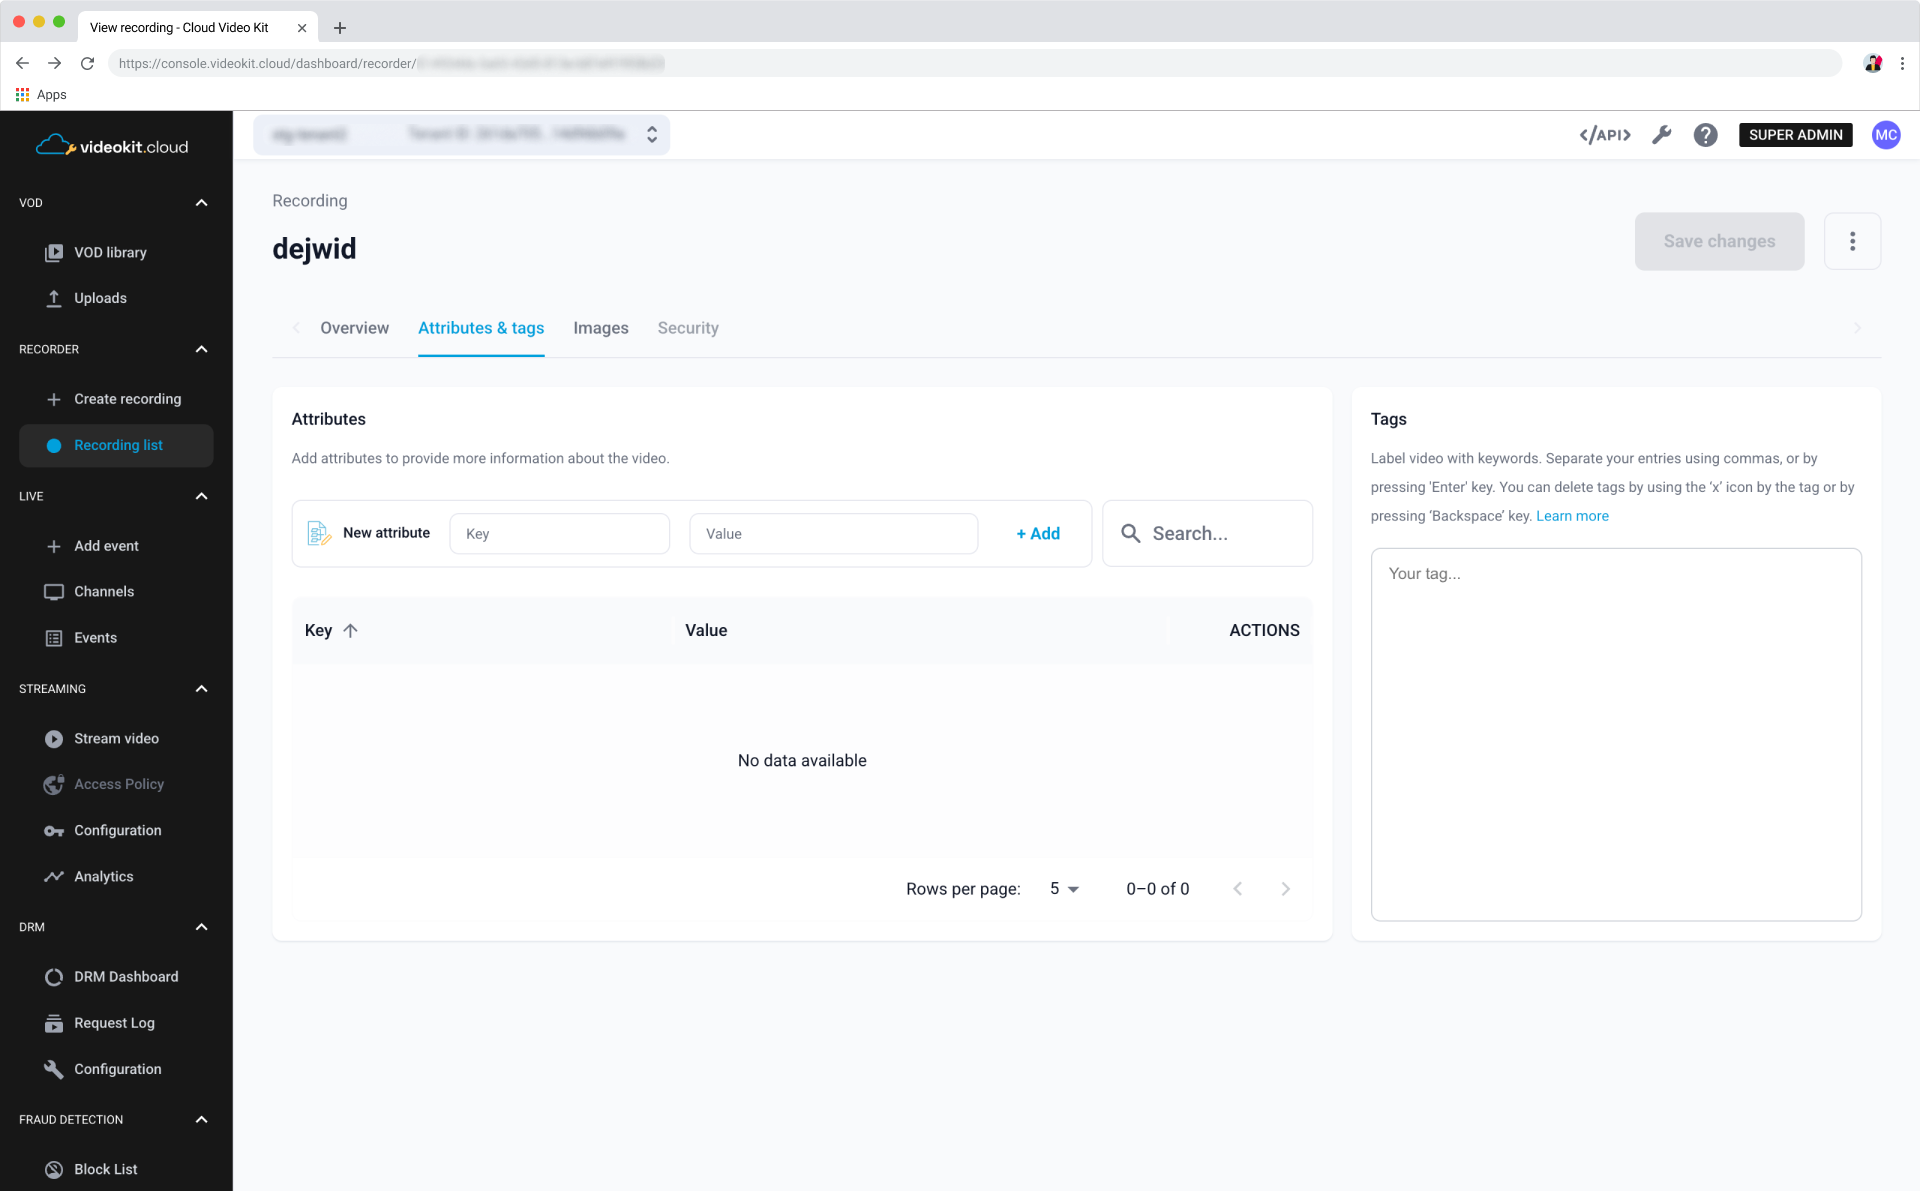
Attributes & Tags
Customize your video with attributes & tags to provide more information to the video player and enchance searchability of your content.
Managing Attributes
Add new attribute by filling Key and Value fields, and hit +Add. You may also search for existing attributes, edit them or remove.
Make sure to use Update Attributes & tags button after making changes.
Managing Tags
Add new tag by entering the word or phrase. Separate your tags by using commas, or by pressing "Enter" on your keyboard. Tags can be removed by using X next to a tag, or by pressing "Backspace" key.
Images
Manage images associated with your stream:
- upload or remove images,
- preview source video frames,
- select poster for your video,
- select custom images for video player to use.
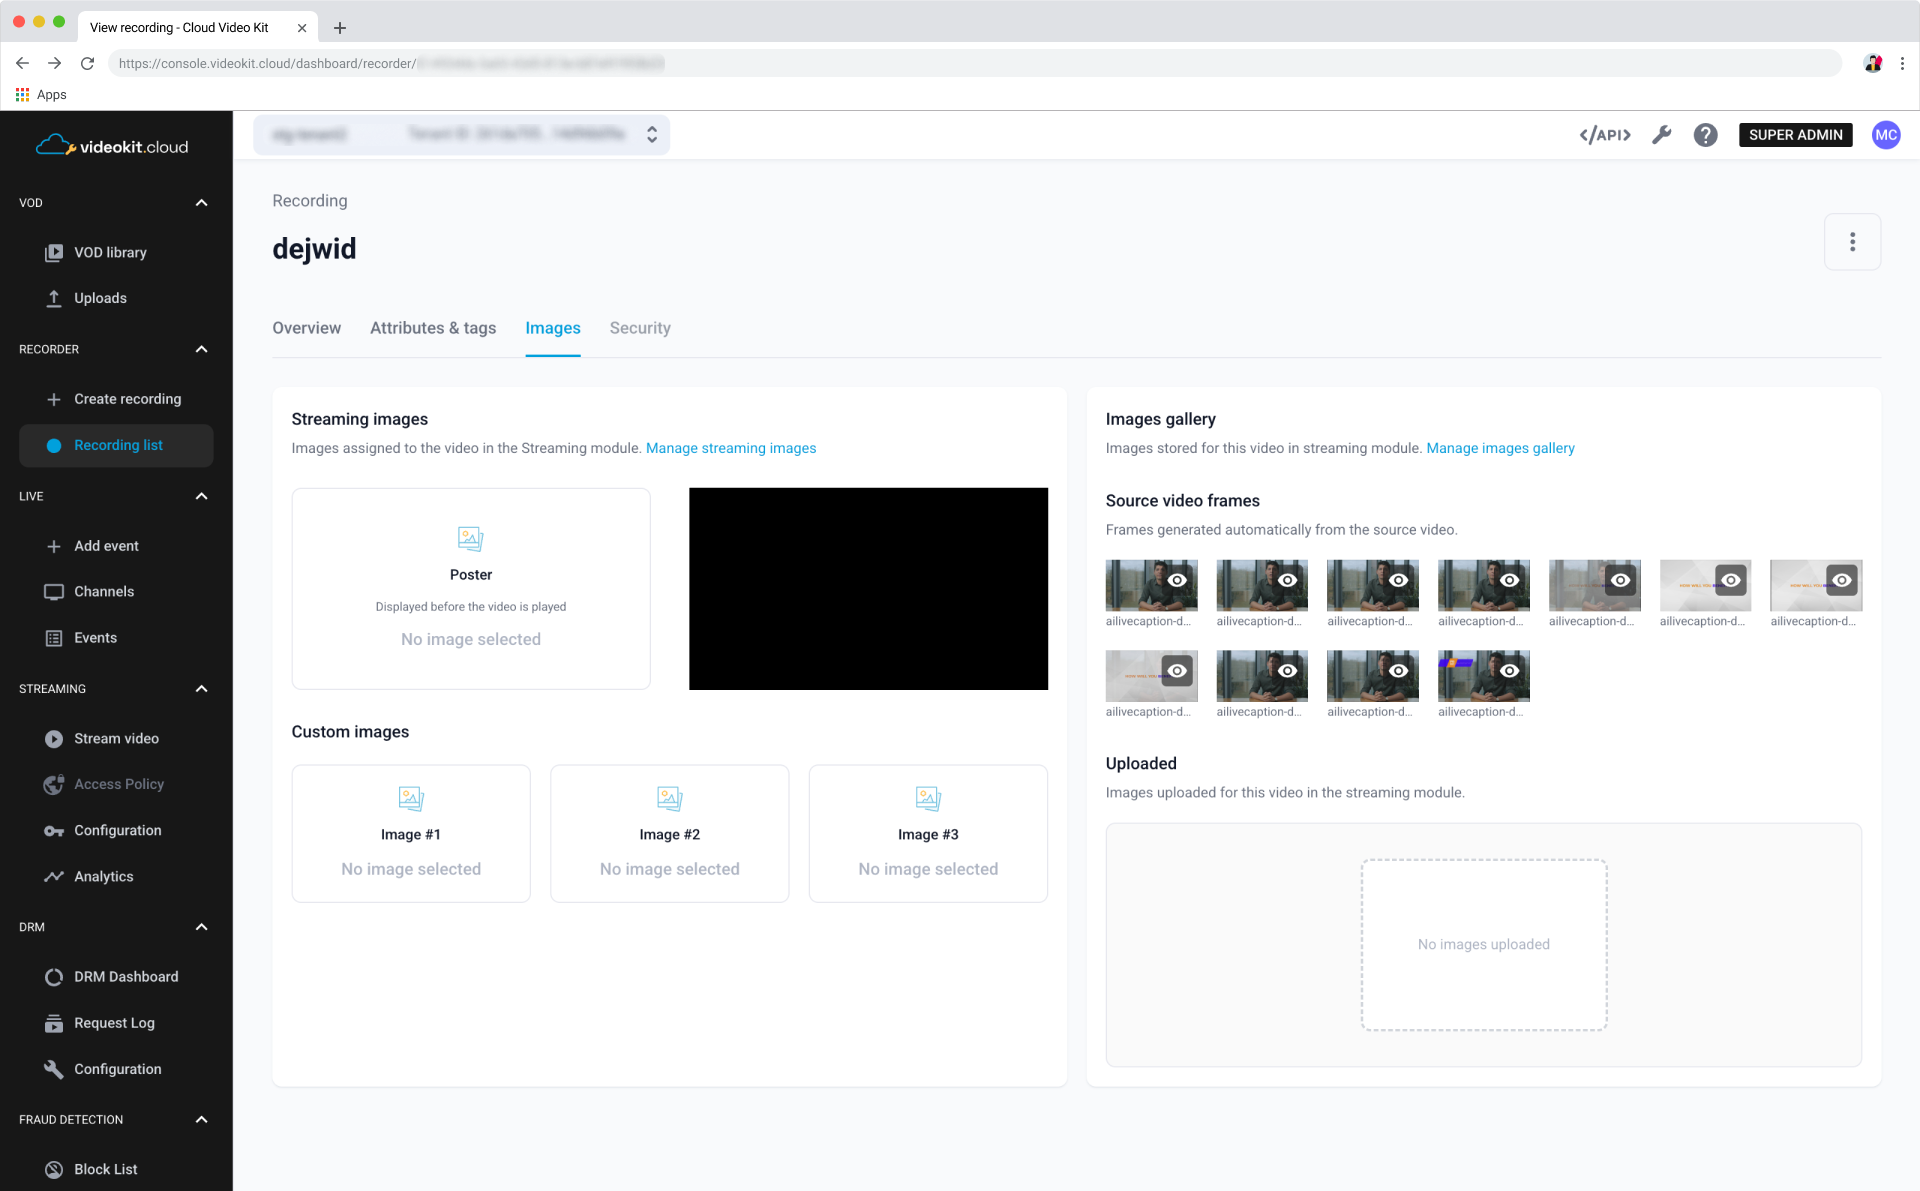
For the poster image use the same ratio as video player.